[Site Name]
[domain_name]
(999) 999-9999
[address1]
[address2]
[City, State Zip]
Room / Zone Settings
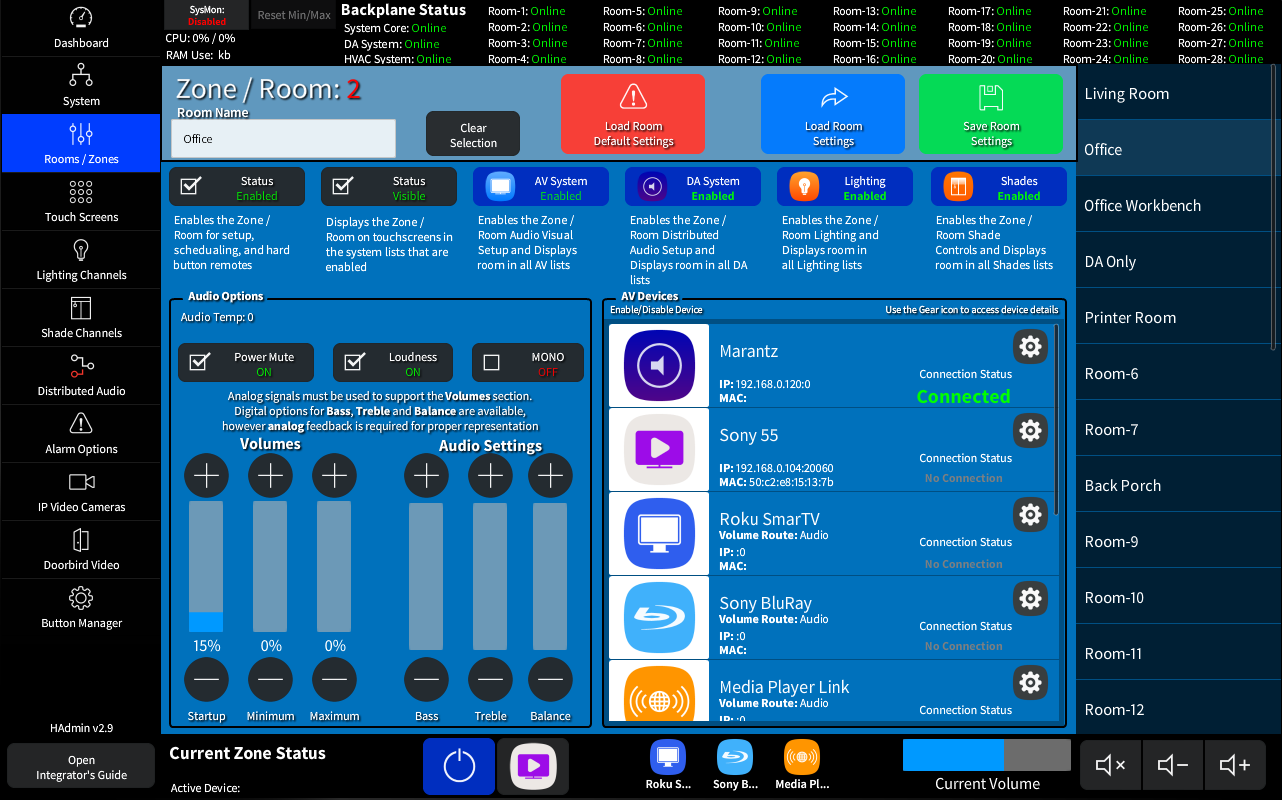
The Room / Zone page is where you setup each of the (up to) 28 Rooms in the system. Each Room has configurations options for an Audio Device (Amp, Reciever, etc) a Video Device and up to 8 Local AV Devices (Apple TV, Kalidiscape, etc). You also have access to a virtual remote so you can verify control of the room right from the admin window.
This page is orginized into 5 main areas listed below.
The Room Options Area

Here you can Enable / Disable each system in the relitive room.
- Enabled / Disabled: This will enable the room in the system allowing it to be used in scheduling, by keypads, etc without beiung shown on the User Touch Screens.
- Visible / Hidden: Once a Room is Enabled you can then make it Visible or Hidden in the lists on each of the User Touch Screens.
- AV System Enabled / Disabled: Enabling the AV System will make this room show in the Video System List of the user Touch Screens, and allow for additional configuration options on this page.
- DA System Enabled / Disabled: Enableing the DA System will make this room show in the Music System List of the user Touch Screens.
- Lighting Enabled / Disabled: Enabling the Lighting System will make this room show in the Lighting System List of the user Touch Screens allowing access to each assigned light
- Shades Enabled / Disabled: Enabling the Shades System will make this room show in the Shades System List of the user Touch Screens allowing access to each assigned shade
Analog Audio Options
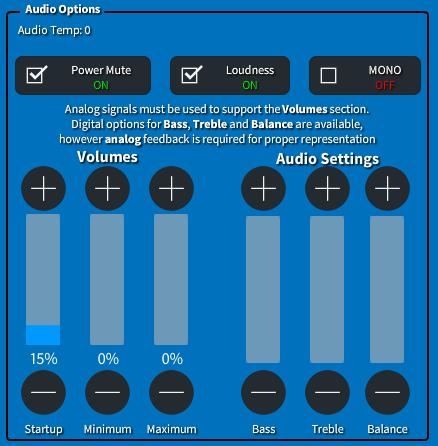
The Audio Options area for Analog based amplifiers such as the Swamp 24 or other amplifiers.
These controls are also available on the User Touch Screens in the Settings Area.
- Loudness and Mono/Stereo: are standard digital toggles that can be used on any amplifier with the available triggers.
- Startup Volume: This is the standard Creston Startup Volume (0-65535)
- Minimum Volume: The Minimum allowed volumne. (0-65535)
- Maximum Volume: The maximum allowed volume. (Minimum volume-65535)
(NOTE: Analog control signals on the amplifier are required for use of these options.)
The AV Device list
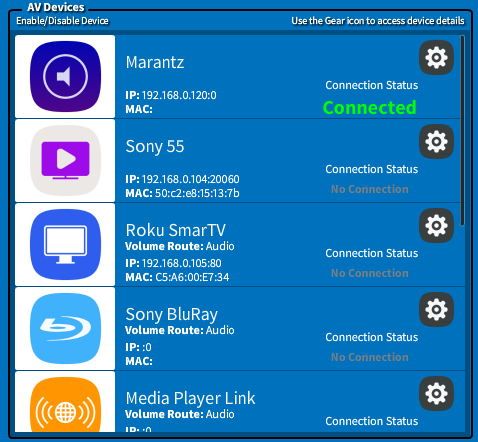
The AV Device List allows you to configure the details for each of the local room devices.
- Clicking the Icon will Enable the device allowinfg access to the Gear Icon.
- The Gear Icon opens the Details Popup for the device allowing it to be configured.
(shown in next section - The AV Device Details Popup) - Once configured you will be able to see the additional details.
The AV Device Details Popup
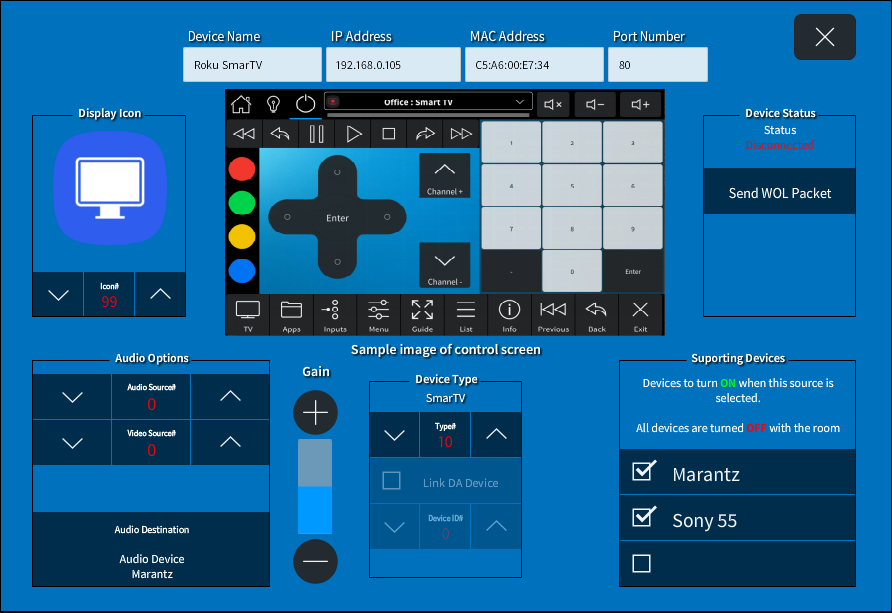
The AV Device Details Page allows for configuration of the 8 local devices along with an Amplifier, Video Device and (optional) Aux device.
Most options on this page shold be familiar to experianced integrators therefor documentation will focus on the custom system elements.
- The Display Icon will show on all touch screens and is effected by the selected user theme.
- Send WOL Packet will use the supplied MAC address and send a Wake On Lan packet to the device. If the device uses WOL and is properly configured it should turn on once clicked.
-
Device Type affects the displayed interface on user touch screens. We have included several for commonly used devices.
NOTE: Up to 20 additional custom screens can be added. (See The Interface Project Guide for details on adding additional device control screens -
Link DA Device (enabled when the Media Player type is selected) allows you to link the device to an installed Distributed Audio Media Player using Crestron CRPC Signals.
Once enabled select the Device ID to link with. - Audio Destination can be Audio or Video device for the room. The volume controls for the remote is automatically switched to the proper device on device selection.
- Supporting Devices allows for power control of the required devices. Each device MUST have one of the Audio or Video device selected. You can also select Both the Audio and Video devices. This is the most common setup for a Home Theater with a Television and a Receiver.
- Source Options allow you to set an analog source ID (used in some amplifiers and televisions) for both the audio and Video device being controlled. This is selectable per device.
The Room Status and Controls Toolbar

The Room Status and Controls toolbar gives you administrative access to the local room controls including a virtual remote popover that has all possable driver pack signals to the room available.
- Power Control and Status (Blue = On)
- Virtual Remote Activation (see The Virtual Remote in the next section.)
- Local Device List - selecting a device will activate the room just like a user remote.
- Volume Level and Controls - Quick access to the volume controls (including Mute) for the room.
The Virtual Remote
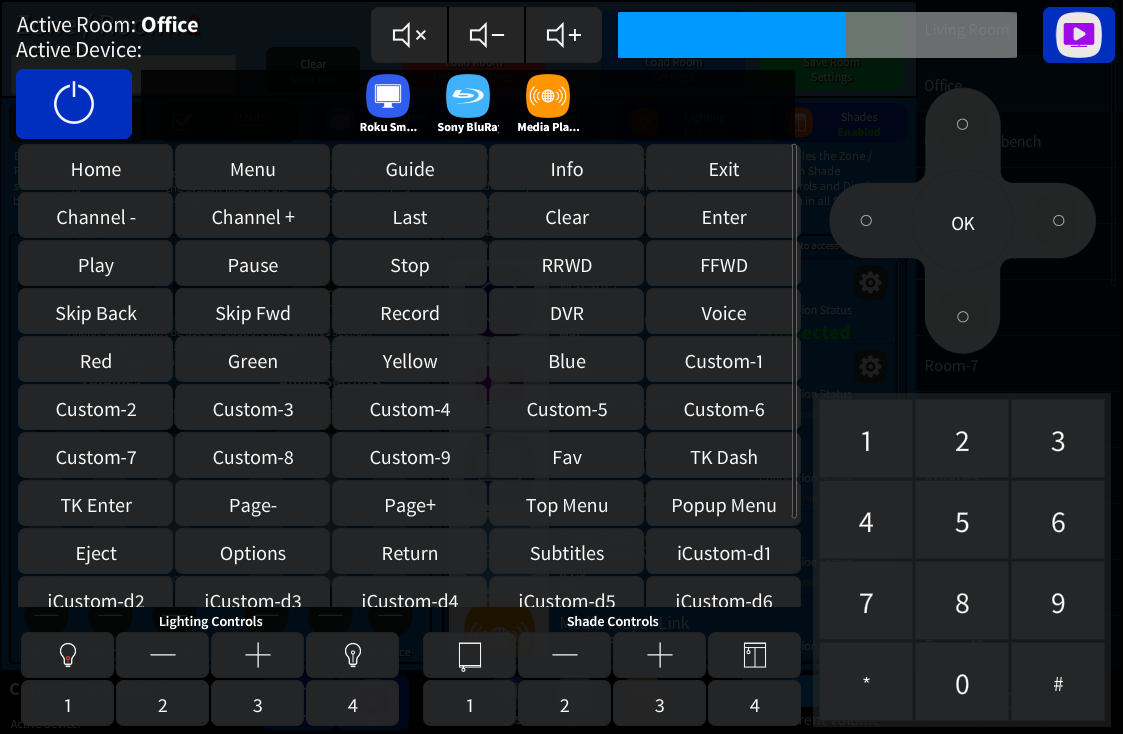
The Virtual Remote has all device endpoint signals for the room available for testing and debugging.
Use the icon in the upper right to close. |
See:
The Room Endpoint
for full details on available device signals.