[Site Name]
[domain_name]
(999) 999-9999
[address1]
[address2]
[City, State Zip]
Compiling and Uploading the Project
 Compiling and uploading the project is a simple task and is done using:
- VT-Pro Program View the Crestron VT-Pro Docs
- OR the Crestron Toolbox. View the Crestron Toolbox Docs
 We have tested this and it does not affect the project in any way and igf you look at the file size it is well within the Crestron limitations. We are working with Crestron to diagnose why this happens but the project will still compile and upload to the screen without any issues. This does cause VT-Pro to NOT automatically show the upload tool, but it can still be accessed from File Menu -> Uploaded to send the project to the screen like normal. IF you want to eliminate these warnings, you can remove some of the themes from the project (*our testing shows that by limiting the list to 3 available themes, the warning goes away). This will remove the warnings, but also limit the users theming options to the remaining active themes.
Step by Step Uploading Instructions
This basic tutorial will walk you through the Project Compilation and Upload process.
| 1 |
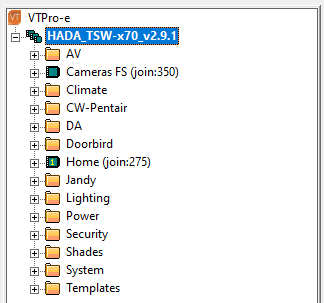
Make sure you have the correct project Open and Selected as shown in the example image. |
|
|---|---|---|
| 2 |
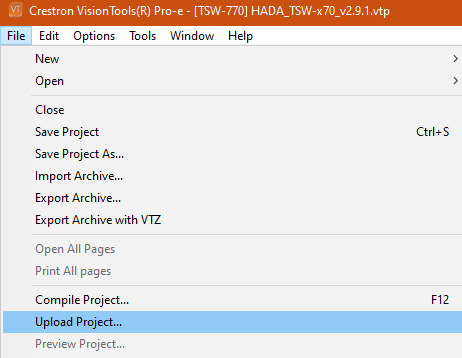
Go to the File Menu -> Compile or use the F12 key as a shortcut. You may get a compiler warning based on the number of themes you have enabled. This will not effect the upload as long as, like the warning says, there is enough memory the destination panel. We have tested the project with default theme options on the 652, 670, an 770 and various other size (up to 15") Crestron Touch Panels and all have worked. |
 |
| 3 |
If the upload window does not load once the compilation proccess is finished, then you can open it manually by clicking on File Menu -> Upload. At this point it is no diferant than any other Crestron Interface Project. |
 |
| 4 |
Once your address book opens, select the entry that corisponds tyo the TouchScreen you want to update. If the touch screen is not listed in your address book you can add it now or enter the connection information manually. |
 |
| 5 |
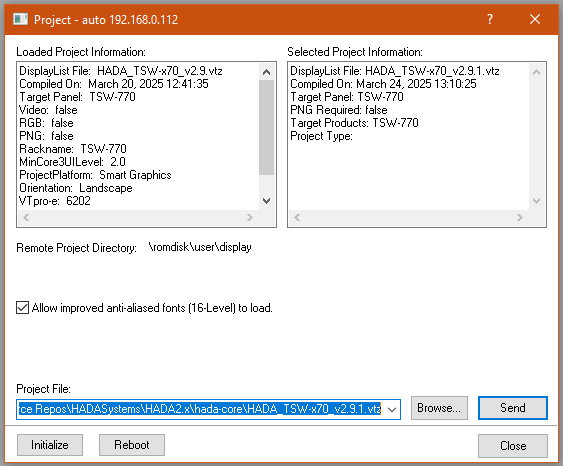
Once connected to the panel you will see a report showing the current project details in the left side pane, and the newly compiled project details in the right side pane. Verify that the selected upload file is the correct file and then click send and wait for upload to complete. |
 |